I've been working on the look and feel of my emulation and wanted an OS4.x feel which meant, for me, the place to start was with the icons and the obvious choice was Mason Icons of which there are a huge selection of OS4.x icons from ADPro to YAD and a lot in between, however there are gaps that need filling so I downloaded Icons Reworked and cha05e90 Icons. Using the all the releases from all three gave me most of the icons I needed, from system icons to software icons.
For an OS3.x machine to be able to display OS4.x icons properly an updated version of icon.library is needed or else the icons appear corrupt.
Changing the icons and adding a more colourful wallpaper allowed me to take E.M.M.A. from...
to...
As you can see I have made it a little more colourful. I have used the Fire Ice Planet wallpaper, amended the dock to incorporate OS4.x icons, removed some of the apps I will use least, installed NoWinED and dock icon as my text editor of choice and even replaced AWeb with iBrowse, browser of choice, mainly due to the fact that I'm not keen on AWeb and I couldn't get Netsurf working.
I have nine application available on the dock:
1. iBrowse
2. Personal Paint
3. AmigaAmp
4. Amiga Shell
5. DOpus
6. LhA-RAM
7. ScreenMode Prefs
8. Input Prefs
9. NoWinED
 |
| Loads of Icons and Many More Besides |
For an OS3.x machine to be able to display OS4.x icons properly an updated version of icon.library is needed or else the icons appear corrupt.
Changing the icons and adding a more colourful wallpaper allowed me to take E.M.M.A. from...
 |
| Initial Workbench 3.9 Before Tinkering |
to...
 |
| Updated Workbench 3.9 After Tinkering |
As you can see I have made it a little more colourful. I have used the Fire Ice Planet wallpaper, amended the dock to incorporate OS4.x icons, removed some of the apps I will use least, installed NoWinED and dock icon as my text editor of choice and even replaced AWeb with iBrowse, browser of choice, mainly due to the fact that I'm not keen on AWeb and I couldn't get Netsurf working.
I have nine application available on the dock:
1. iBrowse
 |
| iBrowse 2.4 |
2. Personal Paint
 |
| Personal Paint 7.2.1 |
3. AmigaAmp
 |
| AmigaAmp 2.11 |
4. Amiga Shell
 |
| Amiga Shell |
5. DOpus
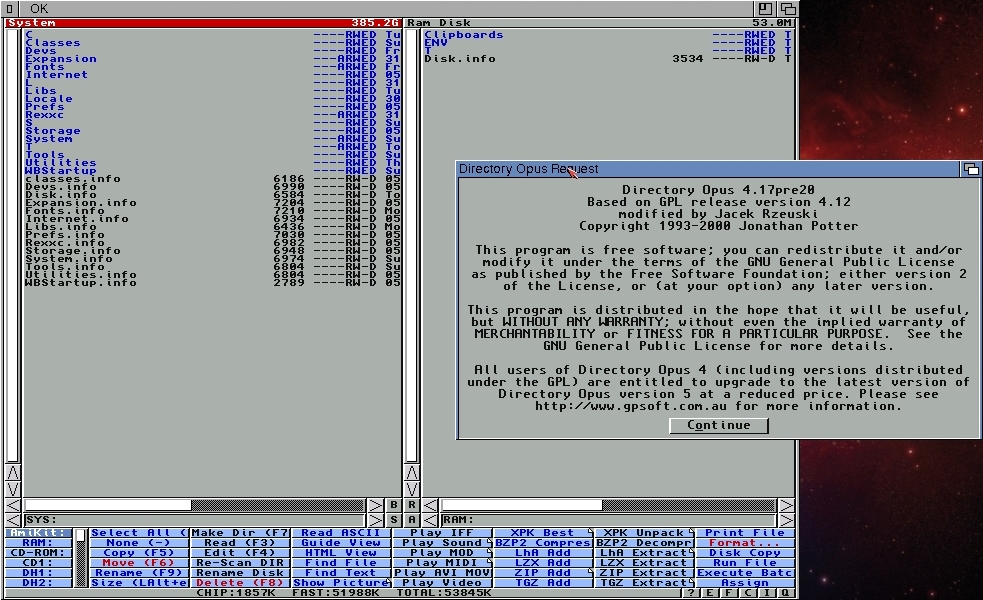 |
| DOpus 4.17 pre 20 |
6. LhA-RAM
 |
| LhA-RAM |
7. ScreenMode Prefs
 |
| ScreenMode Preferences |
8. Input Prefs
 |
| Input Preferences |
9. NoWinED
 |
| NoWinED 0.83 |
I can now turn on my laptop, E.M.M.A., on and it boots straight into a full screen, 1366x768 Workbench, omitting having to see Windows entirely. Unfortunately the boot time is quite excessive, over 1 minute, even having disabled most of the Windows software that used to start on bootup.
I have added some up to date datatypes and libraries and would like to make it look a lot more like my Sam440ep but I am unable to install the DeJaVu font which I use as my default workbench font and I also use it in my InTune program.
I can open Hollywood v7.0 and work on InTune, my music player, allowing me to get on and enjoy programming the Amiga way. I will hopefully, also, take a fresh look at my Star Trek database.
As you can see InTune is nowhere near complete. There's no playlist, not all MP3s load, seems to have some error when reading ID3 tags for artist on some MP3s.
I have to admit no matter how time consuming it is to do all I have done to get this far with E.M.M.A. I have thoroughly enjoyed every minute.
I have added some up to date datatypes and libraries and would like to make it look a lot more like my Sam440ep but I am unable to install the DeJaVu font which I use as my default workbench font and I also use it in my InTune program.
I can open Hollywood v7.0 and work on InTune, my music player, allowing me to get on and enjoy programming the Amiga way. I will hopefully, also, take a fresh look at my Star Trek database.
 |
| Hollywood Running Just Fine |
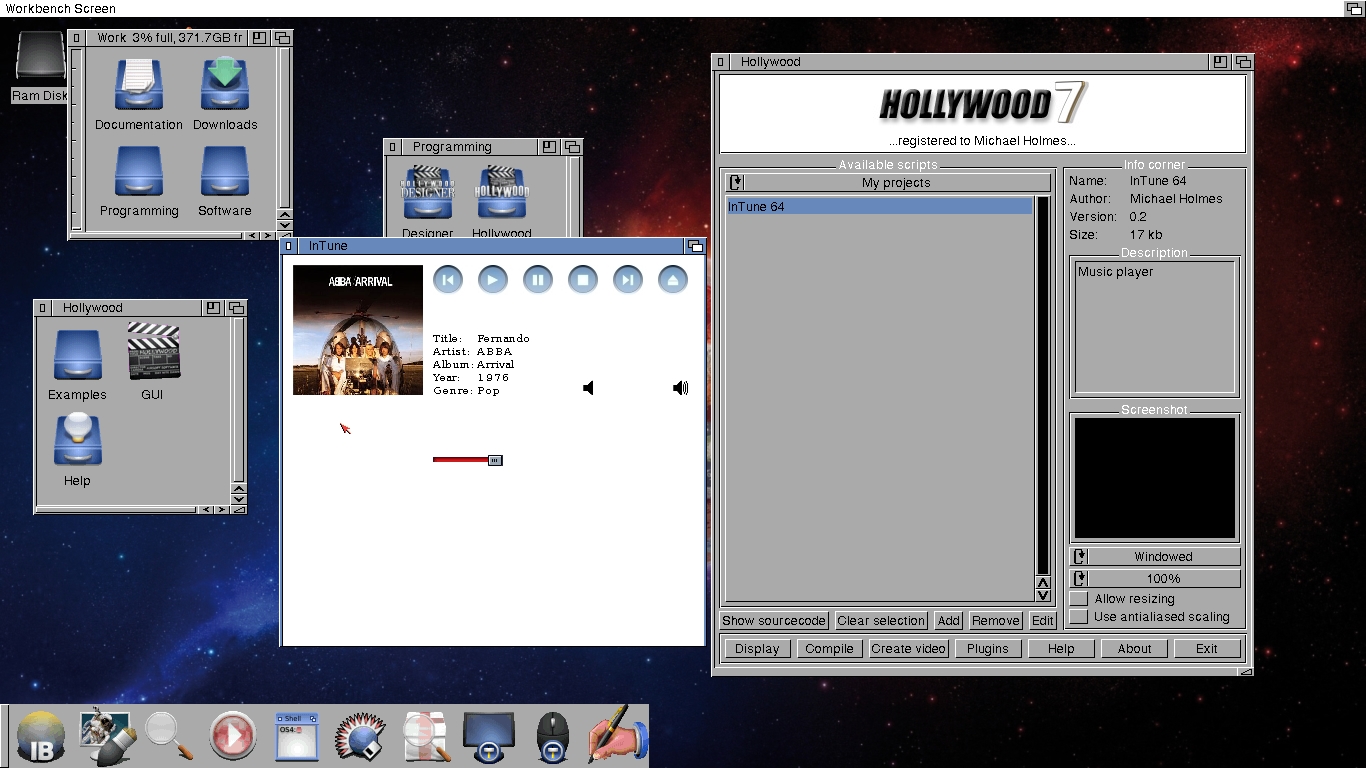 |
| Showing My InTune Program Running |
As you can see InTune is nowhere near complete. There's no playlist, not all MP3s load, seems to have some error when reading ID3 tags for artist on some MP3s.
I have to admit no matter how time consuming it is to do all I have done to get this far with E.M.M.A. I have thoroughly enjoyed every minute.
Michael Holmes