AMIKIT X INSTALLATION
This is just a short step by step guide on how easy it is to install AmiKit X on a laptop.
When we first start AmiKit X we are presented with the welcome screen shown below, let's just press "Next" and see where it takes us.
When we first start AmiKit X we are presented with the welcome screen shown below, let's just press "Next" and see where it takes us.
We are now asked for the folder where we wish to save AmiKit, I will just keep it as the default folder and select "Next".
So far everything is really straightforward with no messing, let's hope this continues, so let's press "Install" ad see what's next.
After just 2 minutes we get the chance to finish the installation process. So press finish and het presto, we are done. We now have our AmiKit shortcut on our desktop.
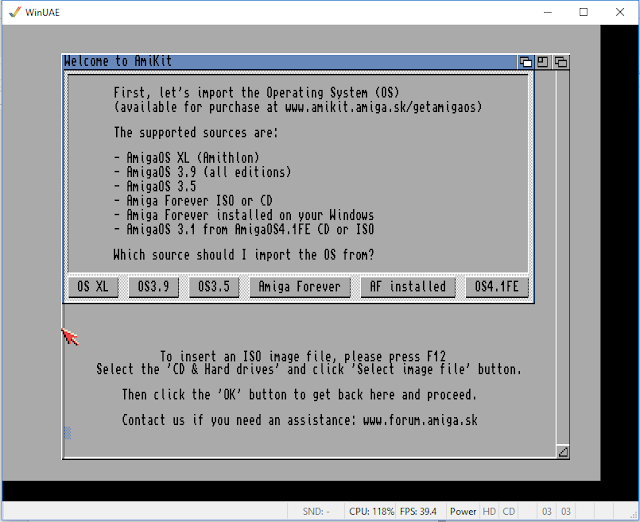
Double clicking the shortcut takes us to the launch window. Selecting "Launch" we are given our first glimpse on the Amiga Workbench displaying the AmigaOS install choices.
As I have a copy of Amiga Forever already installed so I'll just select "AF Installed" and take it from there and it proceeds to import system files, which takes a matter of seconds, then asks me to reboot.
Now I am taken to the very familiar Screenmode Prefs screen and I'll select a mode that is slightly lower than my laptops native resolution of 1366x768 so I'll select 1280x720.
Now apparently my AmiKit X installation is complete and I have to press "Enter" and get ready to be amazed.
Well I am amazed, after playing with it for a while I realise I am willing to go full screen with this so I just press F12 which opens up the WinUAE properties allowing me to select AmiKit-fullscreen.
And the process of having a fully functional AmigaOS laptop is complete.
In my next instalment I will be going to the next level.
Michael Holmes


